
Lettering
Above all else, an engineering documentation must be clear. All text on engineering drawings should be simple and readable. Most older texts (and the ANSI Standard) refer to the standard style of lettering as single-stroke Gothic. This term is somewhat archaic today, but what it means is simply a style of text that does not have serifs or ornaments of any kind. The style of text traditionally used on drawings closely resembles the Helvetica or Arial typeface. When drawing these letters by hand, do not reverse the pencil and draw back across an existing line (this is what single-stroke implies).
There is still value to learning how to letter manually. Even today, engineers and technicians often need to document information manually. Taking time to be careful about the information you are trying to convey is a hallmark of a professional attitude. Engineering journals, purchase requests, even simple notes to other people are examples of documentation that should be lettered carefully. If a student practices enough, these documents can be lettered easily and quickly. All text on student work should be lettered carefully.
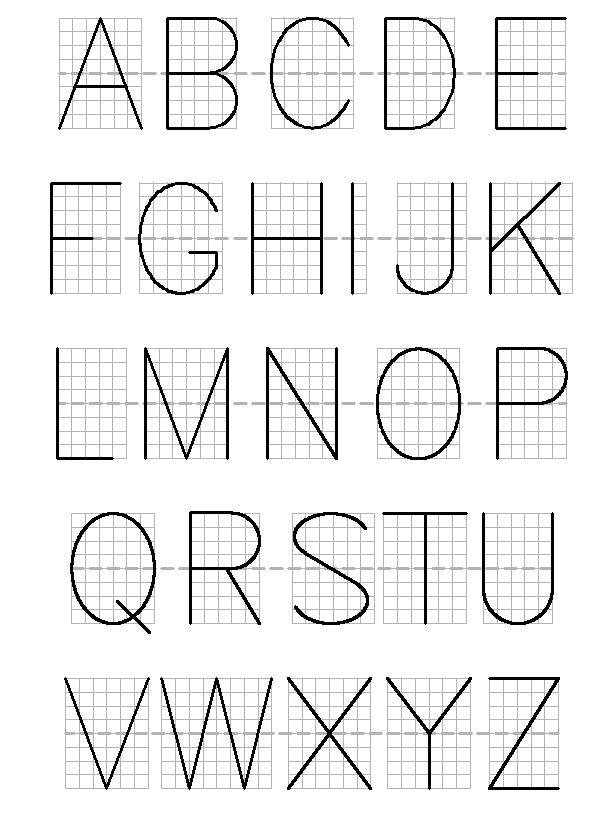
Below is a guide to lettering upper-case in the traditional sans-serif (without serifs) style. The letters are laid out on an eight unit tall grid; notice that the width of the letters varies. Also note that while many letters have elements that align with the middle line, some do not.
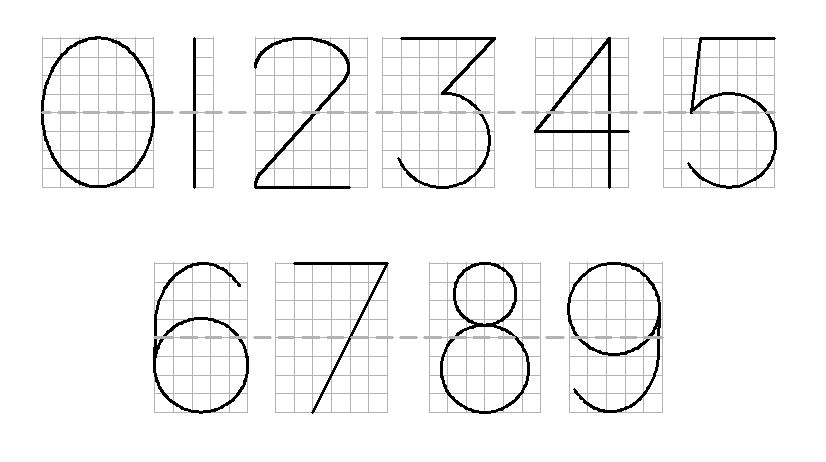
The number characters are defined in a similar way. Note that shape of many of the numbers may not be the same as what you are accustomed to writing. It is especially important that the number characters are made as they are shown below.
Guide Lines
In order to letter by hand properly, the height and position of the letters must be controlled. Guidelines are very light lines laid out with a 6H or harder pencil to give the drafter. Lettering without guidelines can only be done if a lettering template is used. Even so, a bottom guideline may still be required to help align the letters. There are tools available to speed the process of drawing guidelines. The Ames® lettering template is of the most popular.
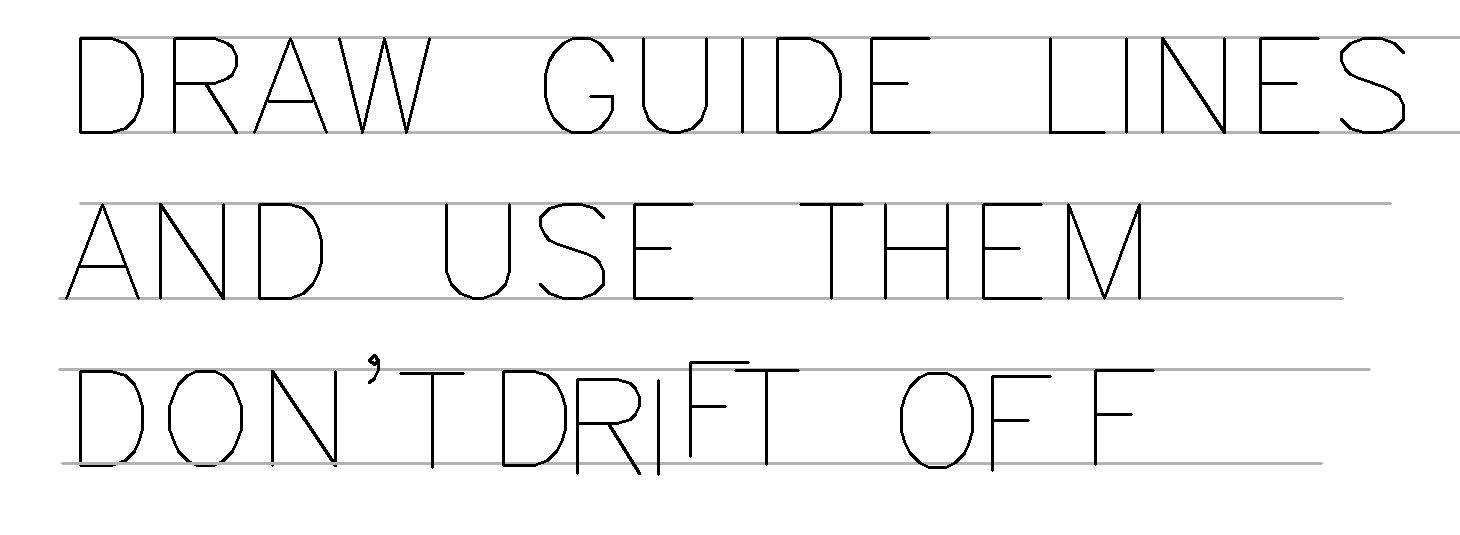
Be sure not to just draw the guide lines, but to actually use them. It is a common problem for students to omit guidelines or for their letters to drift away from them.
Letter Height
Whether a drawing is done in CAD or by hand, the letters must be large enough to be read and reproduced clearly. The minimum height of letters on a printed drawing is .12 inches (about 3.0 mm). The letters for the title block on large (D size and above) is .24 inches (about 6.0 mm). Letters that are used to indicate section views should be .24 inches tall. The only text that is allowed to be smaller is the text used to label the title block. This text can be .10 inches (a little bigger than 2.5 mm).
Letter Spacing
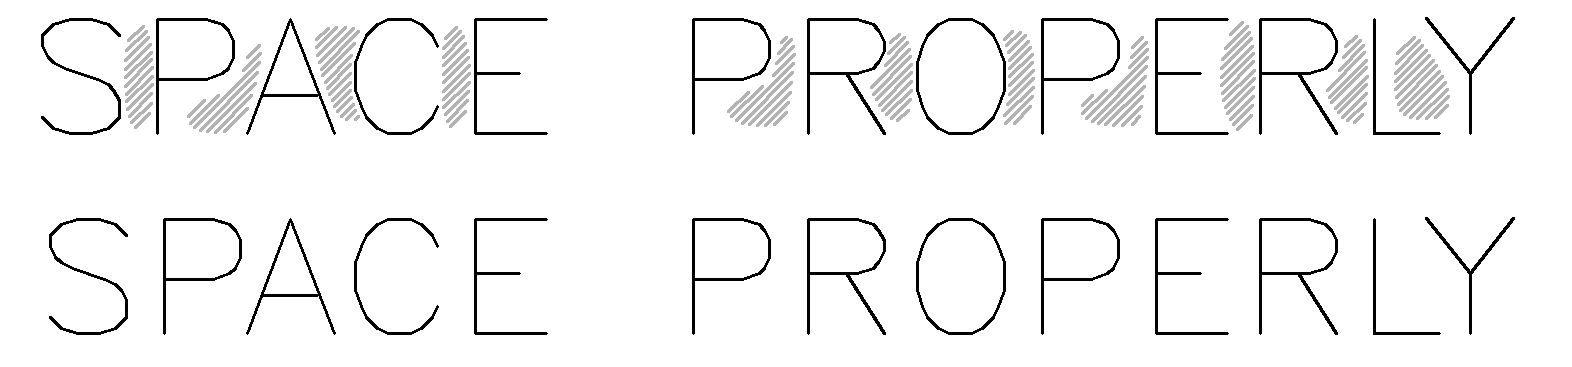
There should be adequate space between the letters, but not too much. Try to maintain an equal amount of space between the letters. Note that this does not mean to space the letters equally. If the letters are spaced an exact distance apart, the effect is to make the spacing look inconsistent. The shapes of the letters themselves influences how closely they should be placed together. For example, the letter “A” would be placed closer to the letter “T” than the letter “M” would be to the letter “I.” It would be incorrect to space each letter an equal distance from one another as this would make the text hard to read.

Properly spaced letters have an approximately equal amount of empty area between them. Some letter combinations (such as L and Y in the example below) actually overlap.
Like the spacing between letters the spacing between rows can be too large or too small. There should be a minimum of half a letter height between rows of text. If the spacing is greater than the height of the letters, the meaning of the spacing becomes ambiguous. If two rows of text are not meant to be read together, be sure there is greater than 2 text heights between them. As a rule of thumb, use 75% of the letter height for the space between rows.
Other Options
You may have noticed that all of the sample lettering has been in upper case so far. That is because all lettering on a drawing should be done in upper case. There are very few exceptions to this rule. Some companies prefer that the letters be slanted like italic letters. This is an option, but is not covered in this text in the interest of simplicity. When revising an existing drawing, however, personal preference is not an option. You must letter in the same style in which the original drawing was done.

Recent Comments